14.1 Getting Started
As our next Scratch activity, in this chapter we work through the process of building a small game in Scratch. It will allow us to use much of what we have already learnt, as well as practice working on a slightly bigger programming project. You have probably played a maze game before, now we will build one!
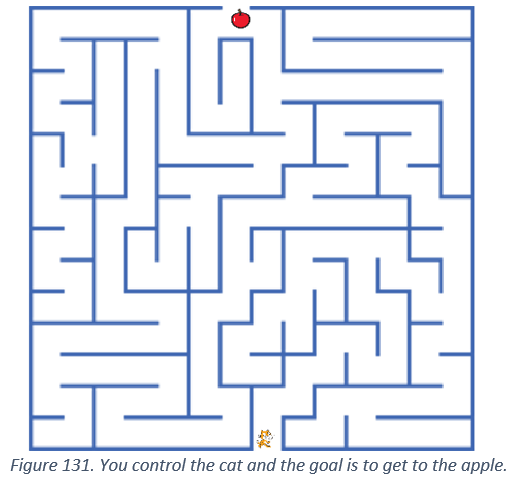
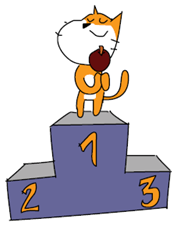
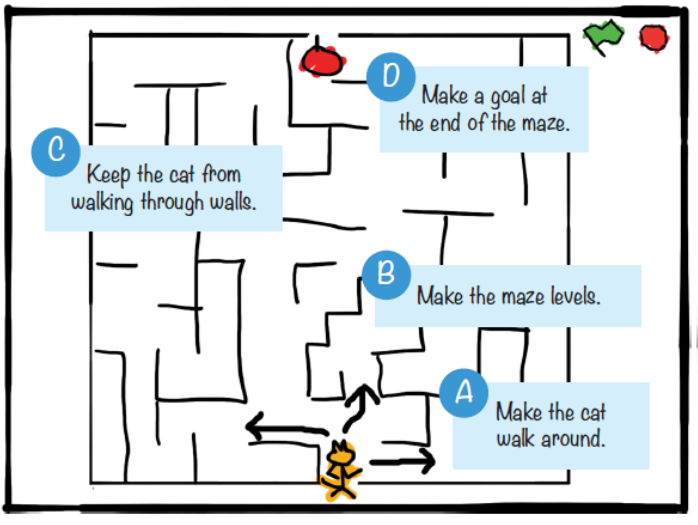
We create a game that lets the player guide a cat through a maze to the delicious goal of an apple! This will require that we move the cat using the keyboard and block its movement through the walls of the maze. The order in which we accomplish different tasks is shown in the Figure below.
14.2 Making the Cat Walk Around
Our first task is to make the cat move around when the player presses the arrow keys. This is achieved by adding the following code for Sprite1, i.e., the Orange Cat.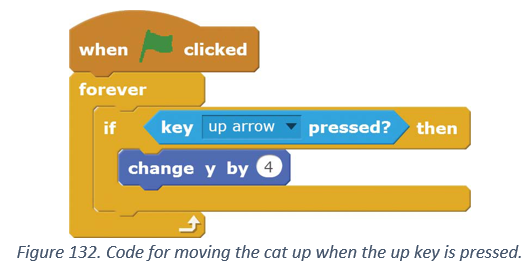
These blocks are in the Events, Control, Sensing and Motion categories. The code can be read as “forever check whether the “up arrow” key is pressed, and if it is, increase the y position of the sprite by four”. You should check that your code behaves as you expect it to behave.
The forever block means that Scratch will keep executing the code inside the loop until the red stop sign is pressed. If the arrow key is not pressed, then the block causing the change in Sprite’s position is not executed.
Now we just need to include code for motion using the remaining three arrow keys, i.e., down, left and right. To save time, you can right-click on the yellow “if-then” block and select duplicate to create a copy of the blocks. These blocks will be identical, so all you will need to change are the dark blue Motion blocks for the other directions. Duplicating blocks can often be faster than dragging new ones from the Blocks Area.
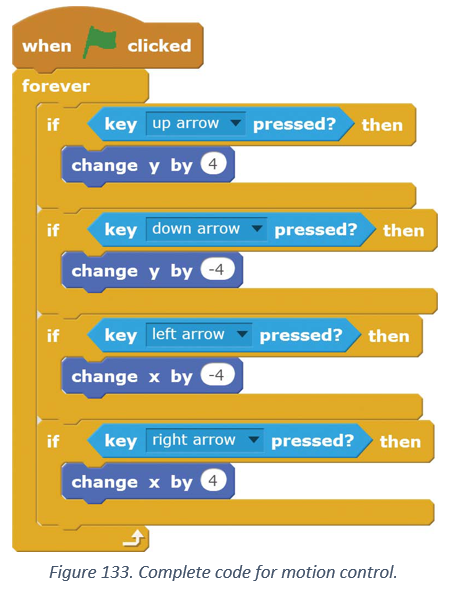
Our code for motion checks if any one of the four keys are held down after another. After checking the “right arrow key” Scratch starts from the top of the repeat forever block again. All this happens so fast that it appears to the player that all arrows are being checked at the same time.
It is good practice to check that your code works as you expect. It can become quite difficult to debug the program if you only run your code after completing everything.
14.3 Making the Maze
Making the Mazes
You can choose to load maze sprites and set the backdrop for the stage using the upload option button for sprite and backdrop.
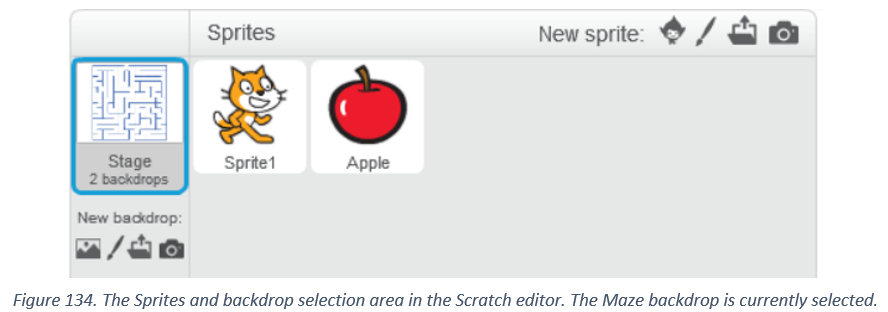
In the Scratch editor, use the “Upload Backdrop from file” button in the Backdrops area to load the file Maze.png. This creates a new backdrop named maze consisting of a single maze. This helps you get started quickly without spending too much time creating the mazes. You are welcome to create your own mazes as well.
A stage in Scratch can have more than one backdrops to change the way it looks. The backdrops, which you can see by clicking the Stage tab are often used to animate the background. You can also change the background image by clicking the “Choose background from library” button in the New backdrop section of the editor. The shown background in the beginning of our discussion is the image labelled light blue.
Add the following code to Stage after selecting the Stage, as shown in the Figure above.
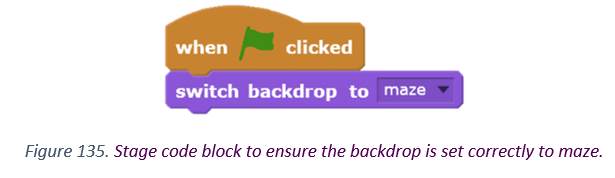
Each backdrop that is added will be a new level of the game. When the player clicks the green flag to start the program, the game should begin with the first backdrop. When the stage tab is selected, you will need to center the maze by clicking on the Select tab and dragging the maze to the center of the screen.
You Shall Not Pass
Let us now add code that check whether the cat is touching the walls of the maze. In a normal programming language, this can be a slightly tricky thing to code but Scratch makes this task easy. In addition, you may have noticed that out cat’s size is quite large compared to the paths in our maze, so we also need to add code that makes the cat small and positions it correctly at the starting point.
There can be multiple ways we can write a program to stop passing through the walls of the maze. The main idea behind out script will be the following: “if moving in one direction has caused the cat to touch the wall of the maze, then move the cat in the opposite direction by the same amount” . So for example, if the cat moves to the right (change x by 4) and this results in the cat touching then wall, then we make the cat move left by the same amount, i.e. (x changes by -4). Due to the speed at which the computer executes our program, it will appear as if the cat has not moved at all and stops it from moving through the walls.
Click the cat sprite in the Sprite List and change the code to look as follows. Note that we use the “touching color?” block from the light blue Sensing tab. Do not confuse it with the “touching?” block
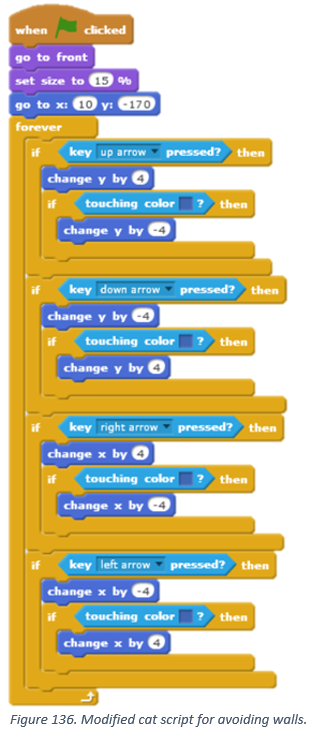
Notice also that we have used the “set size” block from the purple “Looks” tab to make the cat size smaller. We also move the cat to the starting point of the maze and position it in front of the maze. The code blocks for this have been place at the beginning of the script.
14.4 Fixing the Goal
Let us add an apple sprite at the other end of the maze to make clear the goal of the game. Click “Choose sprite from library” button (the one that looks like a face). Select the apple image from the new window that opens up and click “OK” to add the new sprite to the list.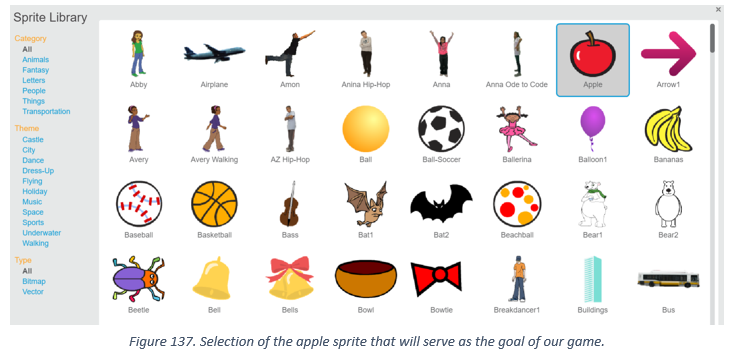
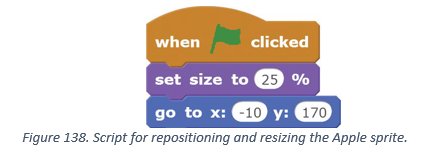
When the game starts, we want the Apple sprite to move to the end of the maze. We also need to make it small enough to fit in the maze. Choose the Apple sprite from the Sprites List and add the following code to resize and reposition the Apple.
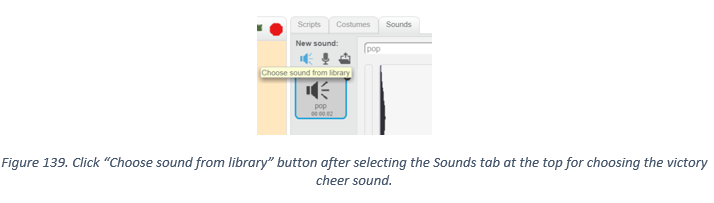
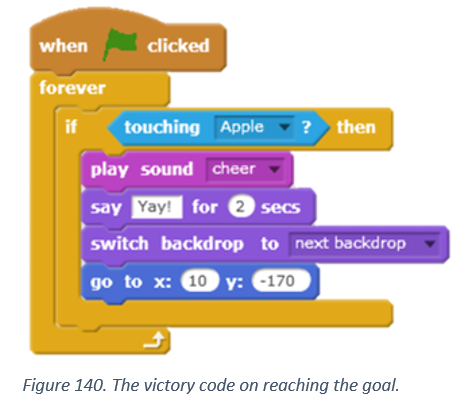
Finally, we just need to add code that detects that the player has reached the goal, i.e. the Apple sprite. When that happens, we play a victory cheer sound. Select the cat in the Sprite list and choose the Sounds tab at the top of the blocks. Click the “Choose sound from library” button that looks like a speaker under “New sound”. Select the “cheer” sound in the new windows that opens and then click “OK”. The result is that now the sound code blocks in the Scripts tab show the cheer sound as an option. Add the following code to the Cat’s sprite code. This completes our code for the maze navigation project.
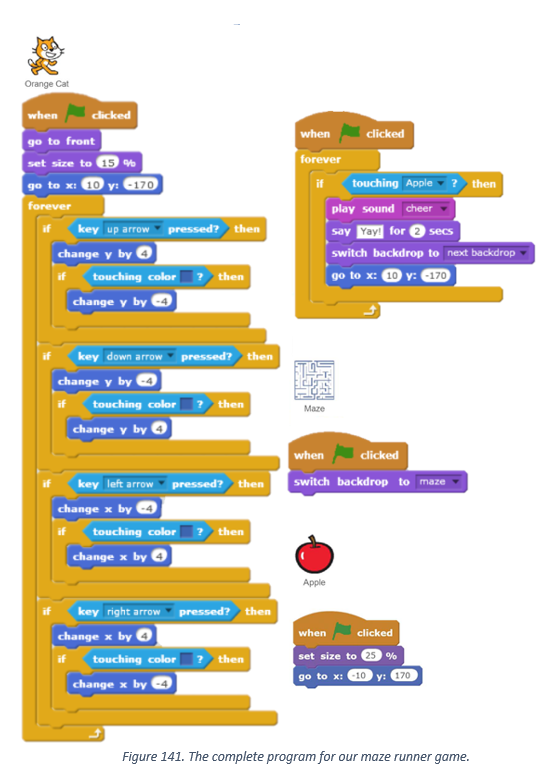
The code on the following page shows the entire program. If your program does not work correctly, go through this listing and check it against the code you have in Scratch. Make sure that the script for each sprite matches the listing.
Suggesting Additions to the Game
For those of you looking to add new features to this game, here are some ideas:
- Add a two-player mode. Add a new character sprite that starts off next to the Apple and has to navigate the maze in the opposite direction to get to different goal. You will need to figure out what keys on the keyboard should move the new sprite. A common choice is the WASD keys.
- Add traps in the maze that delay the player if they pass over it.
- Add bonus pick-ups in the maze that make the sprite faster for a limited time.
- Add a cheat mode, which allows the player to pass through walls if a special key is pressed.
Feel free to play around with the code. Maybe you can add some of your own ideas… Have FUN!